Pre/Post Production
Equipment
- Camera body
- Lens
- Vertical battery grip
- Battery charger
- x2 batteries
- Wrist strap
- x4 memory cards
- Lens cloth
- Myself
Shoot Plans
I plan to walk one route in Wotton-Under-Edge.
- Mount Pleasant
- Wortley Road
- Locombe Place
- Knap Road
- The Oak Ground
- Synwell Lane
- West View
- Holywell Road
- Marchese Walk & Dyers Brook
- Court Orchard
- Synwell Lane
- Mount Pleasant
I've decided that I am not going to take my tri-pod with me, because of the angles I want to shoot. I also want my images to be hand-held/natural.
I will be walking this route about once a week, at different time of the day to see if anything changes. I want to show the smaller images in the landscape by using different perspectives and angles, rather than looking at the landscape in front o you as one big picture.
To take these different perspectives I plan to get creative by sitting and or standing in the road (carefully). Getting up close to things to take them from different angles. I plan to use a range of shots including: close-up, extreme close-up and medium shot.
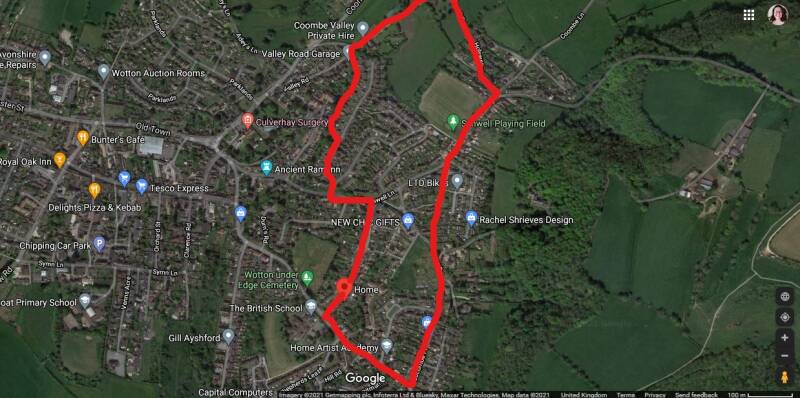
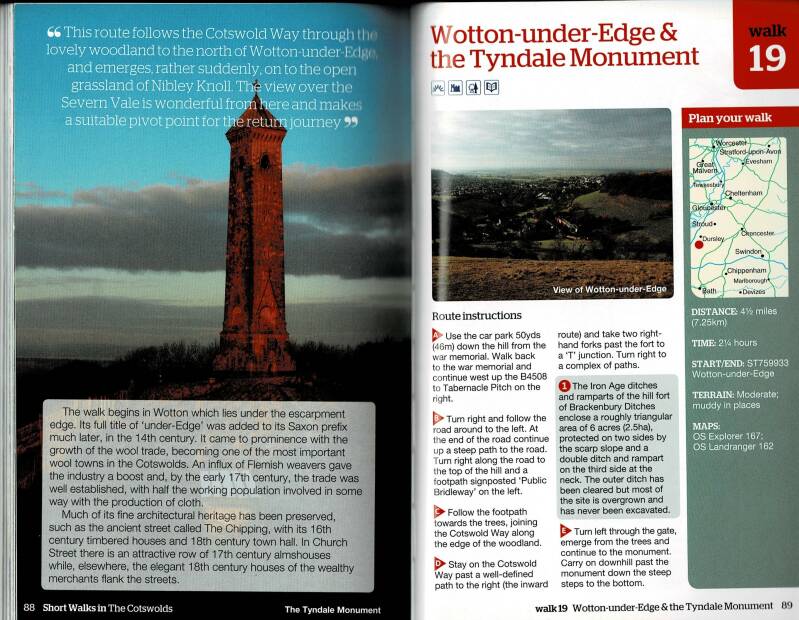
Image Selection
Of our final images for our Issuu book we had to select between 1-3 prints to hang at exhibition. In the brief we needed to choose 6 images to print, however due to spatial issues, our lecturers asked us to have no more than three prints. To do this I decided to lay all my prints out on the table and widdle them down by taking two out at a time. By doing this, I found it was easier to keep the narrative. For my Issuu Book my images are in order of the walk, rather than what images look best and that I what I wanted to do for the exhibition. I chose to pick key point on my walk to display. We had a choice of A1, A2 or A3. I decided to go for A2. As I had chosen three prints I decided A1 was too big and A3 was too small for exhibition, so I decided on A2.

Post-Production
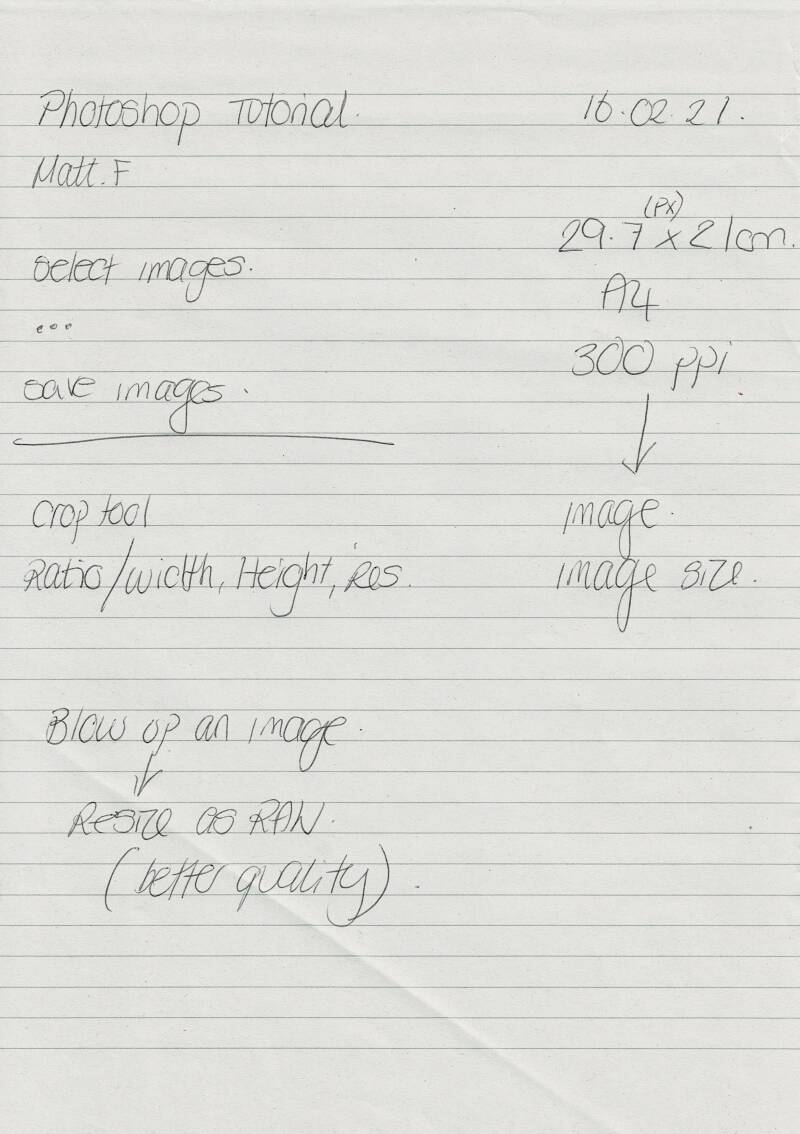
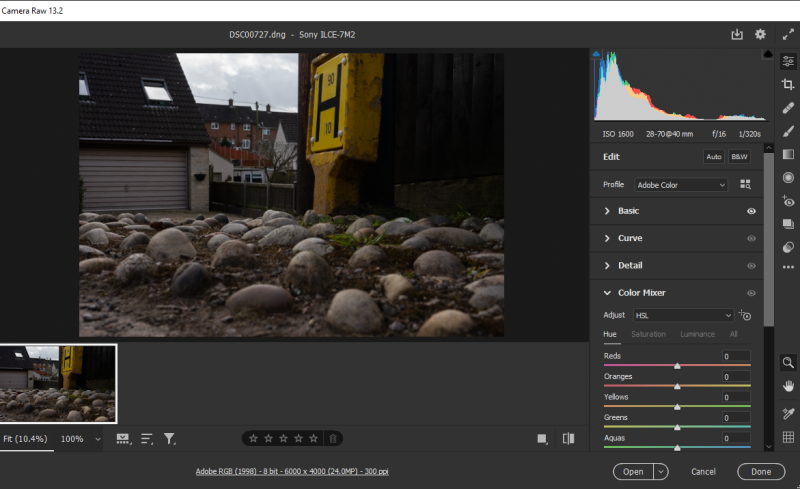
Due to my lack of Adobe Photoshop skills our technician Matt, gave me two 1-2-1s using Camera Raw and basic Photoshop functions.
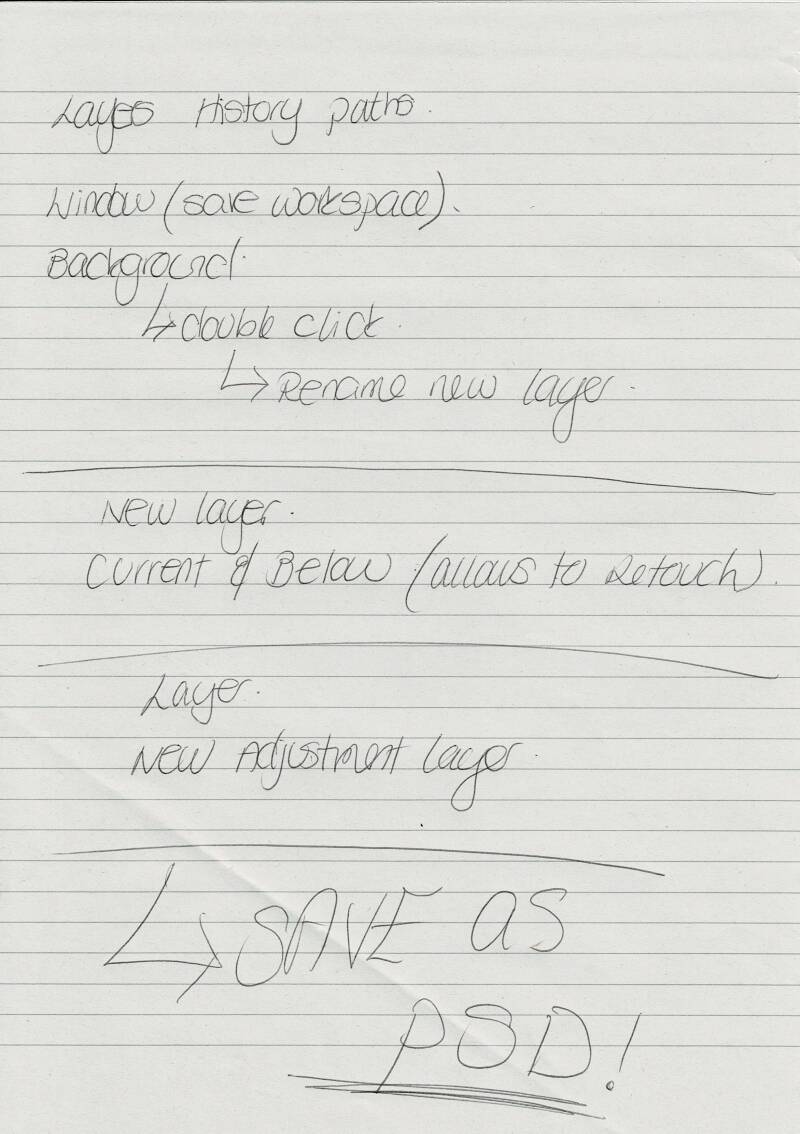
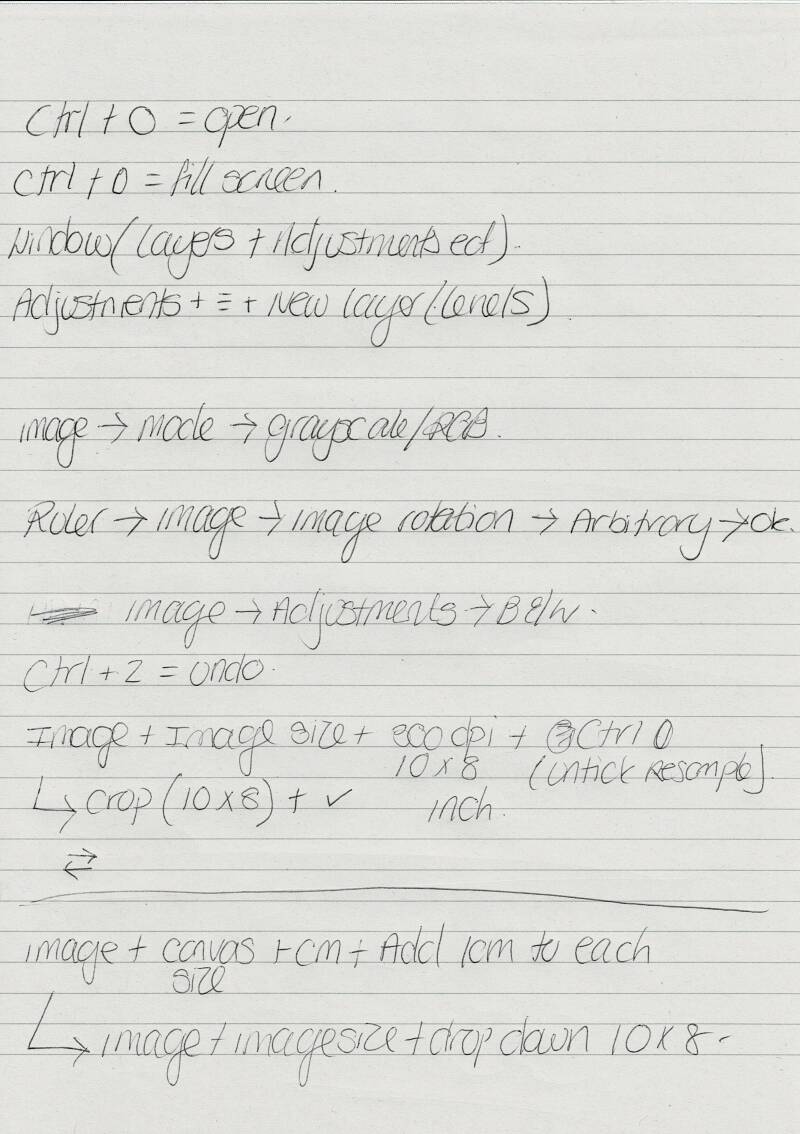
Photoshop Tutorial - Matt.F - 16.02.21
I found the after practicing with Camera Raw, my editing has become so much easier. I try my best to take less images, spending more time taking them. This makes post-production much easier as there is less to edit. Now I am studying Photojournalism and Documentary Photography opposed to Editorial and Advertising, Matt encouraged me to try and just shoot in RAW, rather than RAW and JPEG. This was definitely a change for me as I now have to use Adobe Bridge to access my images. It took me a while to get my head around it and I am still practicing, however it is becoming easier day by day and I am becoming a better photographer because of it.

Photoshop 1-2-1 (Georgia. W)
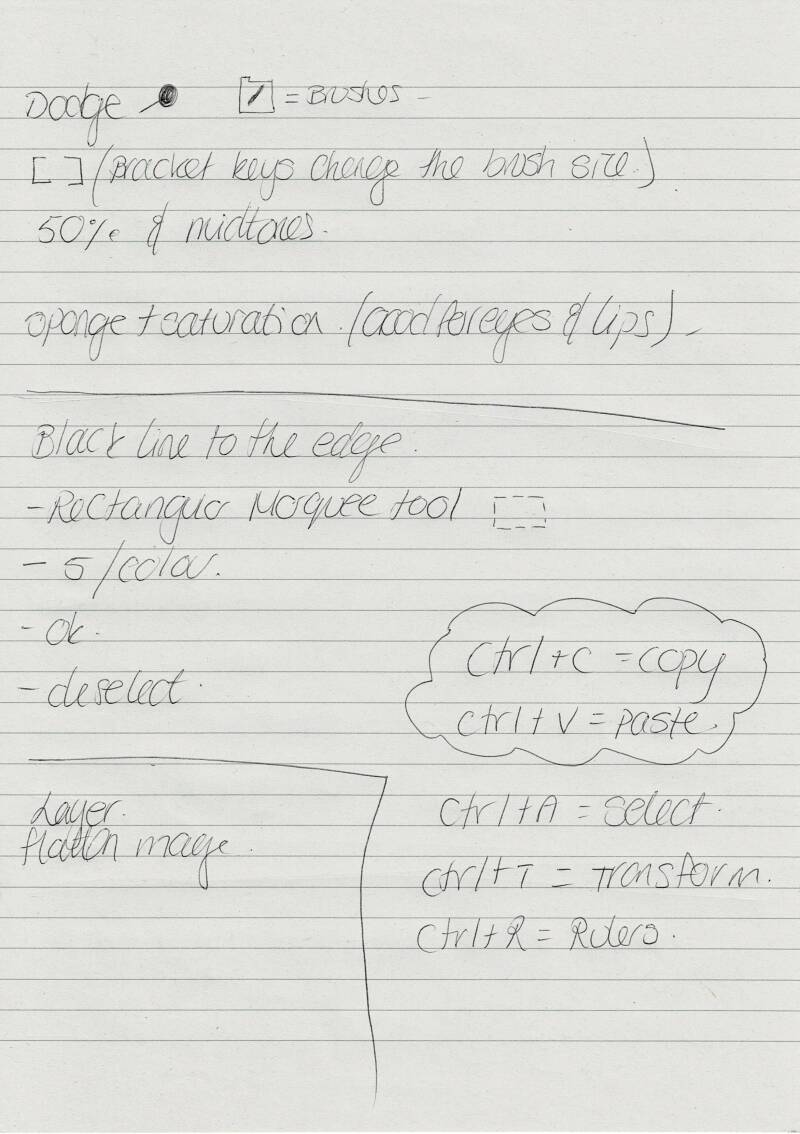
I was able to get another Photoshop tutorial to look at some of the other function's, I found this really interesting and i learnt a lot. I now know how to resize properly and add and or take away boarders from images. I had used dodge and burn before but not for years so it was a nice refresher.
Use of Adobe Bridge and Photoshop skills
For our Professional Practice module we had to secure placement for the module. This became increasingly difficult due to COVID-19, however Barnwood trust had got in contact with the university to ask if they had any photographers that would be willing to commission their campaign. I jumped at the opportunity as it was great experience to go on my CV, it was for charity and it helped me out with my module. Myself and my friend Kieran had also worked with them before on the Wo-tton project so I knew they were reliable.
I was able to use my knew found post-production skills in Adobe Bridge and Photoshop to edit my images. Their were two of us working on the project and as a result our photography is now on the back of 24 buses going out from the Gloucester Depot, the Stroud Depot and also the Cheltenham Depot between the 24th May - 06th June 2021.


Paper Stocks, Print Methods, Colour Management & Size and Format
Paper Stocks
Paper stocks are types of paper. For example it could be made from pine or from waste paper as paper pulp.
- Plain Paper is more for text as a colour image could saturate the paper as it bleeds.
- Inkjet paper is better for double sided printing as it is made with Colour Lok Technology, this stops the image from bleeding and making the paper soggy.
- Laser paper also known as premium colour paper, which hold the ink and creates a smooth surface.
- Matte paper is best for any type of photo that is going to be handled a lot, this is due to less grease transference. So this would be the best for photobooks, magazines and books.
- Bright White paper has good ink control, it makes good double sided images without seeing the one side on the other.
- Glossy paper is great for photography as it brings out the colours however it picks up grease too easy and can be problematic with finger prints. Best for images going straight in either sleeves or frames.
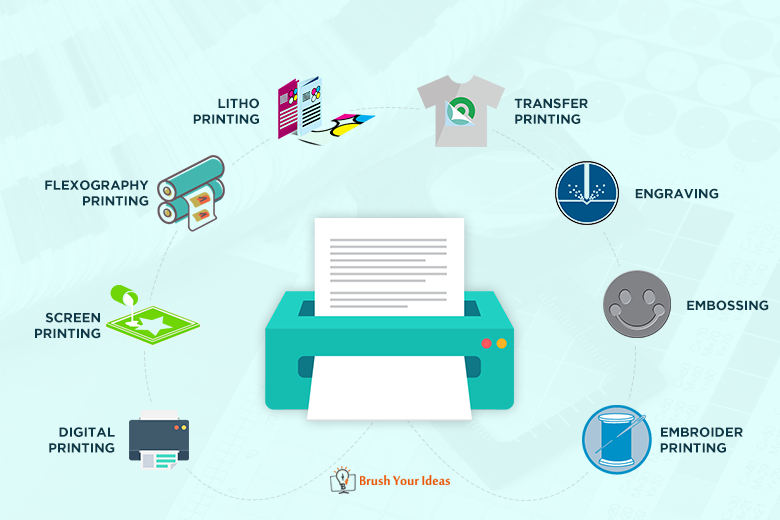
Print Methods
Digital printing is the best for photography as it prints your images as is, however 'Litho printing is much better for large areas of solid single colour'.
However transfer printing and or embroider printing can also be used if you wish to have your images on material such as clothing however you will need those skills alongside photography.
Colour Management (CMS)
Colour management helps to keep consistency in colour between devices. Each time a jpeg is edited the quality deteriorates, colour management is similar in a way but it helps lessen the deterioration to try and keep it the same colour.


Size and Format
Most common photograph sizes:
- 4 x 6 or 5 x 7 in
- 8 x 10 in
- 8.5 x 11 in
- 12 x 18 or 18 x 24 in
- 24 x 36 in
Size matters based on file size (formatting). If you format a JPEG and send it for printing as say A2/A1, or any bigger, you may find the image is distorted. This is because of the file type, JPEGs are made for small images or online media, every time you edit a jpeg it looses some of its quality slightly as its compressed. If you want an image big or blown up to say a bus or billboard size you need to format as a RAW file. RAW files cannot actually be edited, you edit on top of the image, so you will always have the original file, this means the image isn't being compressed and therefore isn't losing quality. For gallery or exhibition display most commonly images are A3 or larger.

Both taken from the internet.
Create Your Own Website With Webador