Plan, Print, Hang
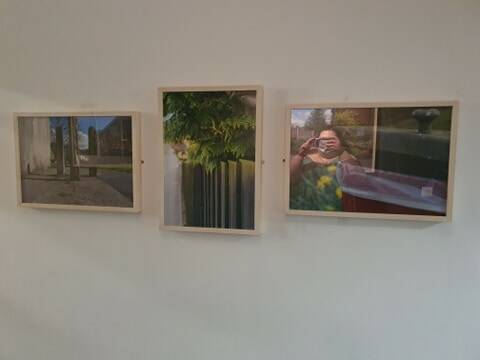
Of our final images for our Issuu book we had to select between 1-3 prints to hang at exhibition. In the brief we needed to choose 6 images to print, however due to spatial issues, our lecturers asked us to have no more than three prints. To do this I decided to lay all my prints out on the table and widdle them down by taking two out at a time. By doing this, I found it was easier to keep the narrative. For my Issuu Book my images are in order of the walk, rather than what images look best and that I what I wanted to do for the exhibition. I chose to pick key point on my walk to display.
We had a choice of A1, A2 or A3. I decided to go for A2. As I had chosen three prints I decided A1 was too big and A3 was too small for exhibition, so I decided on A2.
As a class there were only so many frames, so we had to decide between us how many frames we each wanted and what size to make sure there was enough. Those of us that were not getting our prints from outside sources had to send to the university Hardwick campus technician to print. To do this our course leader sent out an email asking if one of us could collect everyone's images in a one drive folder to then send directly to the technician to print. Kindly, James agreed to do it. He shared the link on our Facebook group chat and each of us upload our images. Prior to sending in my images, I had edited them using Camera Raw and RGB Colour.
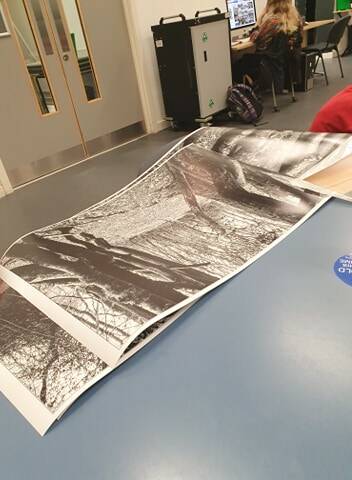
From there we had to go in and collect our prints and cut them to size using the guillotine. My images were slightly wonky on the paper, so I ended up cutting my one image on the smaller side. This made it difficult to frame, myself and Rachael had to use masking tape to put it in place to stop it from moving. On the other side one of my other prints, I found the image itself was roughly two/three inches too big and I had to keep going back to guillotine to chop a bit more off.
Before we could frame our images, we had to use a chisel to pry out the tabs, then clean the glass, making sure there were no little bits of dust and then carefully placing the prints in from the corners using cloth gloves to stop grease from our hands getting on the images and creating fingerprints. Once we were happy we placed the wooden back board back and used the tab gun to insert three tabs each along the longer side and two tabs along each short side. Once that was done we screwed in the mirror plates, one either side, they were ready to hang.
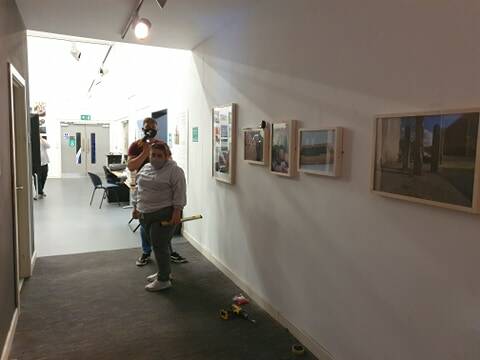
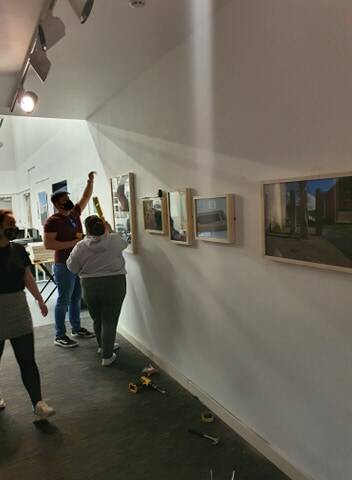
Once everyone's frames were ready we went for lunch. After lunch we began to measure the walls and frames to pinpoint where to hang up the frames. We decided to go from the corner of the wall 120cm in on both sides. 120cm from the skirting board, however this differed between A1, A2 & A3. Between one students frames a 10cm gap was left, but 30 cm between each student, to measure up my own work (A2), Rachael's (A3), Hannah's (A1), Isabell's (A1) and one other students work (A1), it took collaboration between myself, Racheal and James B. Rachael measured and then held the frame up, whilst I used the spirit level to level it and then mark the frame in place, James then drilled the holes. We came up a hack from Facebooks, 5-minute crafts to measure the wall plug to the drill bit and put the tape to mark how far along the drill bit, we then knew how far we needed to drill so that the wall plug would go straight in. Once we put the wall plugs in Rachael hung the frame back up, I levelled it and James screwed it in place with the electric drill. We managed to get the hang of it, which is why we did a few others. Whilst we did that Lucy, and another student began to fill odd holes and paint around the frames.
Once our work was up we printed out our artists statement and mounted it onto foam board with adhesive spray. There was a different guillotine/chopper we used to chop the foam board. One we had done that we backed the boards with masking tape and hung them under our frames to the right using the spirit level.
For our degree show next year I will make sure I bring a spare drill, spirit level, pencil and tape measure.

Create Your Own Website With Webador